Hostgator has what is called the “1 click WordPress” Install. Very simple!
In truth it is a little more involved – but not by much.
1 Click WordPress Install on Hostgator
First log in to your Hostgator account and go to your cPanel.
Click on “Get Started With WordPress Today”

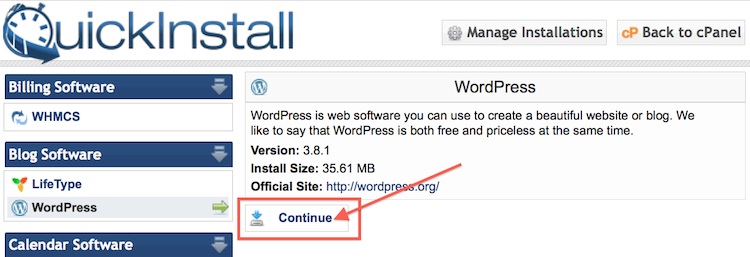
You will be taken to the “QuickInstall” page.
Click on the “Continue” button
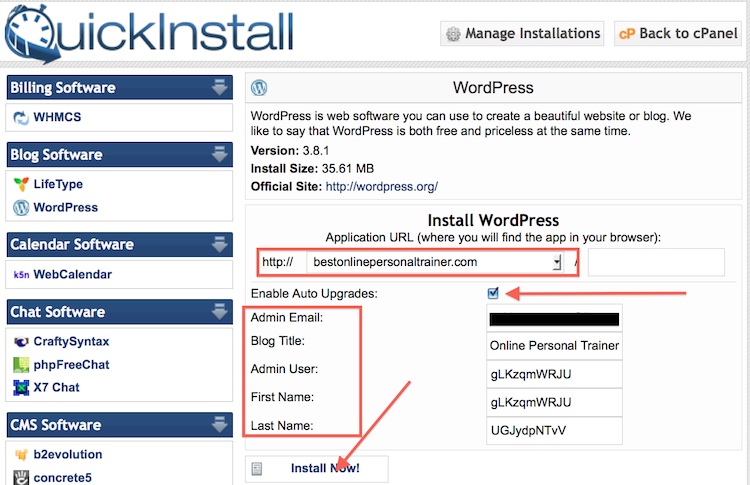
From the dropdown menu select the domain you want to install WordPress on.
You need to enter:
Admin Email – this will be the email address you want to use for this site.
Admin User – to help prevent hacking pick a really weird non-name.
First Name – Same as with the admin name – make it unique.
Last Name – Another unique name.
WordPress sites get hacked sometimes. One of the very basic ways to prevent this is to choose a different admin name and odd usernames.
Find out more how to have a secure WordPress site.
As well choose REALLY difficult passwords using upper and lowercase letters as well as numbers and symbols.
I like using a password generator.
Blog Title – The name you will be calling your blog. Usually similar to the domain name.
*Enable auto updates refers to you allowing your hosting company to initiate a WordPress update when released. These updates are usually for security reasons and it’s a good idea to check this box.
Click “Install Now”
On the screen will be the link to the admin page of your new blog. Just click on that link and login to your dashboard using the password information you entered.
What Happens When Your Blog Isn’t There?
Sometimes it takes a few hours for the new Name Server to populate everywhere. You don’t have to leave the hostgator page open because you will get an email with your login information.